Here is my first crafting tutorial. I have been into the green craft movement for awhile, looking for ways to re-use what I already have instead of filling the landfills or overburdening the thrift store industry with junk that isn’t worth selling. So each day, yes, daily I read online for new ideas. Craft Gossip is a favorite for new ideas as well as Whip Up and the Craftster communities.
Today I realized I needed a giftbag to wrap up my almost 2 year old grandson’s birthday gifts. He is really into Disney Cars and Lightning McQueen. Can you say Ka-Chow?!!! It’s so cute when he says it. Ok, back to the project.
I recently turned a knit t-shirt into two scarves for me and my granddaughter so I am on the t-shirt recycling kick. I figured my heavier long sleeve red t-shirt, with grease spots and holes in the sleeves would be a good candidate for my next project. It almost became more scarves. But like I said, I had a need. So I figured I could make the drawstring bag for Asher’s gifts and personalize it as well.
So I found a picture of Lightning McQueen online, printed it on iron-on paper, reversing the images first, and then used some white cloth, doubled, and made my “stickers” for the bag.
For this project, I wanted about three images. Next, I sewed all around each image to join the layers of the white cloth since it was lightweight.
Next, I laid out my t-shirt, it’s an x-large size, so this bag was wider than it’s height but it works out well. See the grease stain? Yeah, not good for wearing now.
Fold the shirt in half and cut just below the armpit area. Then cut off the bottom hem and save it, as this will become the drawstring for the bag. Be sure to trim it, the hem was serged so it’s not going to unravel.
Next I cut the “stickers” with pinking shears and pinned them in place. I put two on one side and the third on the other side. I also wanted there to be no raw edges showing inside so I decided to do a French seam. These are super easy and give a great finished look to any project.
For the French seam, you join the fabric, wrong sides together first and sew with a 1/4 seam allowance. I sewed the bottom of what is basically a tube of fabric from the shirt. Then you turn the fabric right sides together and press that seam allowance. Then sew 1/2 seam allowance on the wrong side. What you have when you are done is this:
This is the inside of the bag, see no raw edges. I did not trim after the first stitching because I used enough of a seam allowance when I turned it to wrong sides together that it didn’t get in the way.
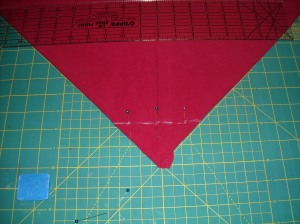
Next, I boxed the corners so there is depth to the bag. I pulled the sides out until there were points, as you can see in the picture. Basically the side seam or crease matches up with the bottom seam. I measured 2 inches from the point, drew a line and pinned. Then sew on the line. Ta-da! You did a boxed corner!
Next, turn down the top hem about 1 inch, making sure there is enough room for the drawstring to be encased. Cut two small slits in one layer of the casing, again, knit won’t fray so this is safe.
Next, grab two safety pins. Put one pin through one end of the string for threading through the casing and use the other pin to secure the opposite end of the string to the bag so it’s not pulled all the way through.
Here is the bottom seam on the outside, and the inside with no raw edges. All ready to be filled with the goodies for Asher!
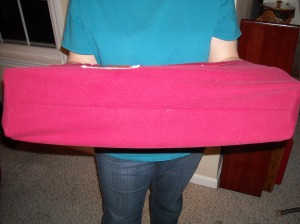
The loot all stuffed in. I know there will be one happy 2 year little red haired boy at my house come Saturday!


